Maple Leaf Scarf
- Jaime
- Jan 2, 2021
- 8 min read
A quick and easy sprang pattern to make this chunky, hide-your-face-from-the-cold, triangle scarf. Because this pattern uses super bulky yarn, this scarf works up really fast. The interlaced structure guarantees no cold wind will make it through this scarf, keeping you warm and cozy even on the coldest days.

This scarf also works up wonderfully in a smaller gage yarn for a smaller triangle. I prefer this in my mild, coastal climate. It is comfortable to wear and provides protection and warmth for the back of my neck. I have not tested the warp length and width for the smaller gauge yarn for the same size scarf as the chunky yarn, I only made smaller scarves. The warp for the smaller scarf should be about 30 inches long. Use this as a jumping off point to try different lengths and widths. Remember that interlacing will have a lot of take up. So my 33 inch warp resulted in a 23 inch long piece before sewing up.


Green scarf is done in Malabrigo Twist, white variegated is Lion Brand Wool-Ease
Yarn:
I am using Loops and Threads Boho Bohemian yarn. This is an acrylic yarn, which I rarely use, but I bought it at 50% off and how can you go wrong with that!? I don't think this yarn is made any more, but if you are looking for inexpensive yarn readily available, a quick look through Michael's selection of super bulky yarns should give some good results. You can also find this particular yarn for sale on Ebay if you want to use the same yarn.
Other yarn ideas:
Malabrigo Rasta; available from Webs or support my local yarn store Fengari Fiber Arts! She has a huge selection of Malabrigo at great prices and has an online store.
Wool Roving; you can usually find this on Etsy. I have not used this before, but I think it would be a fun experiment.
Cotton Air from Ganxxet; I have not used this particular yarn from Ganxxet, but I love their yarn in general, so I am confident this yarn is also wonderful. I have some of their plied paper yarn, which may also work for this project. I will see about testing it out.

Yarns, clockwise from bottom: Loops and Threads Boho Bohemien, Ganxxet Plied Paper Yarn, Lion Brand Wool-Ease, Malabrigo Rasta, Lana Grossa Olympia
The Technique:
The technique I am using is sprang interlacing, over two under two to create horizontal ribs. Interlacing creates the same structure as weaving, but with no weft thread and the warp threads lay at a diagonal. You do not need to know basic interlacing for this pattern, but knowing basic sprang interlinking is helpful. New to sprang or need to brush up on your skills? Check out my blog post on the foundational steps here, or go through my short course on sprang (it's free!), here.

Tools and Equipment:
- A loom: if you do not already have a loom for sprang, check out my blog post on how to make a loom or create something from around the house, here. Do note that the cross loom that I show how to make in that video will only work if you use a false circular warp on it. This is not nearly as complicated as it sounds, but I do recommend warping separately from your loom and then transferring to the loom. If you don't want to use the false circular warp, then I would recommend using a warp weighted system with dowels hung from a curtain rod or door. If you are unsure what that all means, no worries! This is my preferred method for working a long warp and I will be showing how to set it up below.
- Dowels: two thick dowels, at least 1/2'' thick to suspend your warp from. Thinner dowels, 1/4" works well, for the shed sticks. I will only be using three, but you may want more.
- Crochet or Tunisian Crochet Hook: If you have a Tunisian crochet hook large enough to hook onto the super bulky yarn, that is ideal. If not, you will need a crochet hook that will work with the size yarn you're using.
- Scrap yarn, scissors and measuring tape.
If you are experienced with sprang and know how to do horizontal interlaced ribs, then you can skip down to where I show the assembly of the scarf.

Warping:
Your warp needs to be between 6" and 8" wide and 40" long. To warp onto the dowels, I recommend hanging your dowels from a curtain rod, a door or screw two eye bolts into a wall and hang from them. Look around your house, I am sure you have some place that you can comfortably hang a dowel and warp up.
Tie the top dowel on first, leaving enough room to pass your ball of yarn around the dowel. You can tighten this up later if it is too low to work comfortably. Then, using scrap yarn a bit longer then your warp, tie the bottom dowel to the top dowel 40 inches apart. If you are using acrylic scrap yarn as I am, then tie it a little shorter as the acrylic will stretch. Twine is better and stronger for this, I was just being lazy and using what was near to hand.

Here I have the top dowel tied onto my pvc loom. Don't mind the random dowel poking in from the side, I already had a warp on my loom when I set this up.

Here I have the bottom dowel tied on with white scrap yarn. I did not think about how difficult it would be to see when I choose that yarn, sorry!
Also wondering how much it would cost to buy a larger backdrop so that I can photograph my entire loom without having to show my messy craft room in the background. Hmmm...
Be sure your dowels are level before continuing.

Add weights to the bottom dowel. I have laundry hooks that I use with bags of rice, but you can use string to tie on any weighted object.
Start warping by tying your yarn onto the bottom dowel on the left side. Warp in a continuous circle around the two dowels going front to back over the top dowel and back to front under the bottom dowel.

When your warp has reached your desired width, finish by tying off on the bottom dowel.
Leave a tail long enough to sew the short end to the side, about 20".
I recommend tightening up your warp before going any further to ensure you have even tension.
If you are going to work your sprang on the warp weighted set up, then you are now ready to go. If you are working on a loom, then transfer your warp now.
Interlaced Horizontal Ribs:

Interlacing is made up of S-twisted rows and Z-twisted rows. This refers to the slant of the yarn on any given row.
Notice that the the rows follow the slant of the middle of an S or a Z, depending on the row. Rows slanting from left down to right follow the slant of an S and rows slanting from right down to left follow the slant of a Z.
Regular interlinking will be all Z or all S slants. The most common is Z-twist interlinking, which is what I teach in my basic course.
Interlacing is made by alternating one row of Z-twist interlinking and one row of S-twist interlinking and creates an over one thread, under one thread structure. Interlaced horizontal ribs is created by offsetting your rows so that each thread passes under and over two other threads
The following is the directions for making interlaced horizontal ribs. Keep going for a video showing the two rows.
Row 1:
The first row is Z-twist interlinking with a special beginning and ending maneuver of the first two back threads and the last two front threads.
To begin, pick up the first two back threads and slip the second back thread behind the first one and place it in your right hand. Allow the the first back thread to drop behind your right hand. Work the row as a regular Z-twist row by picking one back thread and dropping one front thread. Be sure the first move you make after the special beginning maneuver is to pick up a back thread. When you get to the end of the row, after dropping the third to last front thread you are going to repeat the special maneuver from the beginning with the remaining two front threads. Slip the last front thread behind the second to last front thread and place it in your right hand. Allow the second to last front thread to lay behind your right hand.

Special maneuver to begin the Z-twist row; crossing the second back thread behind the first.

The first move to make after the special maneuver is to pick up the next back thread.
Special maneuver to end the Z-twist row; cross the last thread under the second to last.
Row 2:
The second row is S-twist interlinking with its own special maneuver of the first two front threads and the last two back threads.
S-twist interlinking is simply this: drop a front thread and pick a back thread. Make sure that the dropped front thread lays to the right of the back thread as you pick it up.
Begin by picking up the first two front threads and passing the second front thread in front of the first back thread and allow it to drop behind your right hand while retaining the first back thread in your right hand. Continue the row as a regular S-twist row by dropping a front thread and picking a back thread. Be sure that the first move you make after the special maneuver is to drop a front thread. Always drop your front thread off to the right of the back thread you are about to pick up. When you get to the end of the row, pick up the third to last back thread to finish the regular S-twist interlinking. Pass the last back thread over the second to last back thread allowing it to drop to the back while retaining the second to last back thread in your right hand.

Special maneuver to begin S-twist row: cross second front thread over first front thread.

The first move to make after the special maneuver; dropping the next front thread.

Special maneuver to end S-twist row; cross last back thread in front of second to last thread.
Watch me do both rows in the video below.
Continue making these two rows until you reach the middle.
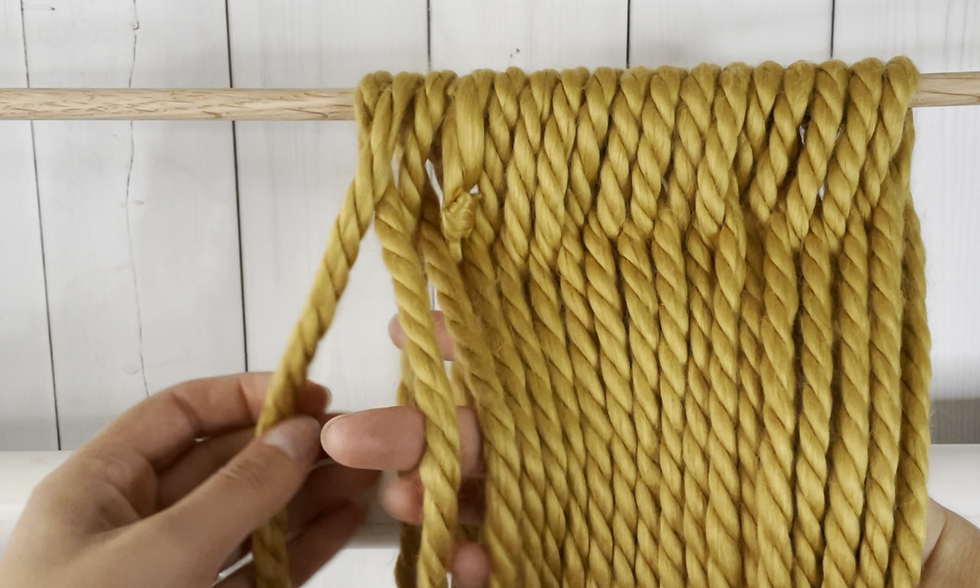
Meeting Point:
Chain the meeting point making sure that your chaining is the same width as the sprang. You can do this by only chaining the front threads (as I do in the video), or chaining one front thread and one back thread as one, or by chaining all the front threads, then turning the warp over and chaining all the back threads.
See how I work the middle rows and chain the meeting point in the video below:
Assembly:

Arrange your scarf so that it is laying as in the photo; the top short end with no yarn ends should be towards you. The side with the long yarn end should be to the left side.
Match up the short end to the left side of the scarf as shown with the red lines. The black dots are to show the two corners that should be matched together.
Your sprang will easily stretch out horizontally, but you need to keep the short end stretched vertically to properly match it up and sew it together.
Sew it up however you like, I have tried a few different ways. I will show the first one I tried in a video to give you an idea of where to start.
I show sewing up the scarf in the video below.
I have a habit of running of piece of scarp yarn through my end loops, this is not necessary, but you will see that I have done that in the video.

Before weaving in your ends, do a quick check to be sure the opening fits over your head. If not, undo the seam and redo it with the short end more condensed.
Once the fit is correct, weave your ends in.
Finally, enjoy your new scarf!
I added some fun scrap yarn to my scarf as an accent. Interlacing is fun to add embroidery and embellishments to as long as you don't interfere with the stretch too much.
I hope you enjoyed this project. If you tried out the project, please share a picture! You can tag me on instagram @solrhiza.arts or on the sprang facebook page (Jaime Bennett).
Happy New Year!
Comments